
If you’re a professional photographer, you must be getting a chance to shoot in low-light photography. So today I’ll be telling you how to shoot in low-light photography. So, here we go.
What is Low Light photography?
Capturing images in the dark, dusk, and dawn nights or light in the outdoors is referred to be as low-light photography.
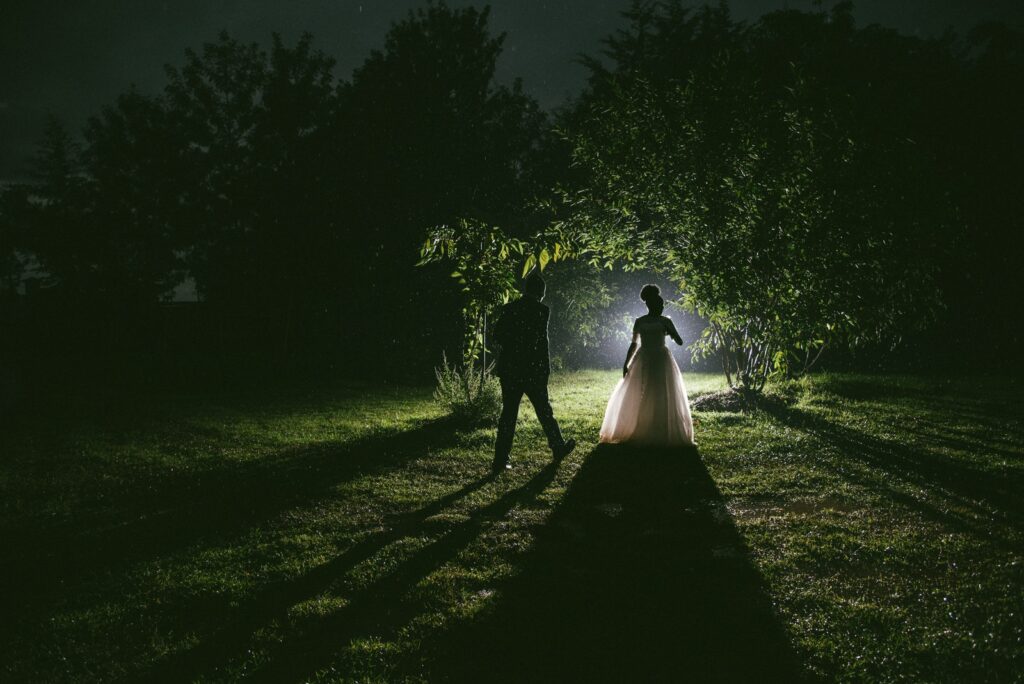
Now here I’ll be telling you the ideas and tips for shooting in the low-light or in the dark place. If you’re a photographer you must be shooting 80% of the time in daylight but occasionally there are rest 20% where you’ll have to shoot at night or in the low-light and chances are you’ve to also find yourself in a low-light situation and if you don’t know some of the basic techniques to approaching this type of shooting environment, you’re going to be stuck with some grainy unusable footage.
- So to start the shoot you must have at least one light source to help bring some contrast and dimension to your scene, now depending on the environment that you’re shooting in, there are probably quite a few natural sources that you could use to help light it up.
- Secondly, you’ll have to light the shadows so, if you’re clicking pictures at night, just light up a fire so that it will act as a key light or you can use the combination of both frontal lighting and backlighting.
- Third thing you need is the proper exposure. Rather than expose the object expose more on the highlights.
- Fourth thing you need is a wide aperture. Due to this, this will brighten your image.
- Fifth thing is the slower framerate that you need while clicking photography in the low-light.
- Sixth thing you need to do is to optimize your camera ISO settings.
- Next should be to choose a camera that does well in low light as not all cameras have the quality to shoot perfectly in low light.
- The eighth thing should be to use a standard profile to utilize all the dynamic ranges.
- Improve the curve panel and bring up the highlights and the mud tones.
- And the final step is to use a denoiser. So if you have followed all the steps and still you have noise in your image I will recommend using a denoiser plug-in to clear it all up the one such as from red-giant as it can be a lifesaver to a photographer in several of the shoots. Sometimes there’s nothing you can do while on a location to accommodate for low-light and you just have to deal with the splotchiness and fuzziness from your high ISO again.
Lastly, I’ll recommend trying all the previous tips that have been first and just use denoiser as a backup mainly because while cleaned up footage you’ll get is definitely usable, it might look a little bit artificial almost like plastic but it is of a lot of use.
So, these are a few of the tips for shooting in low-light photography.
![]()